Paint your normals.
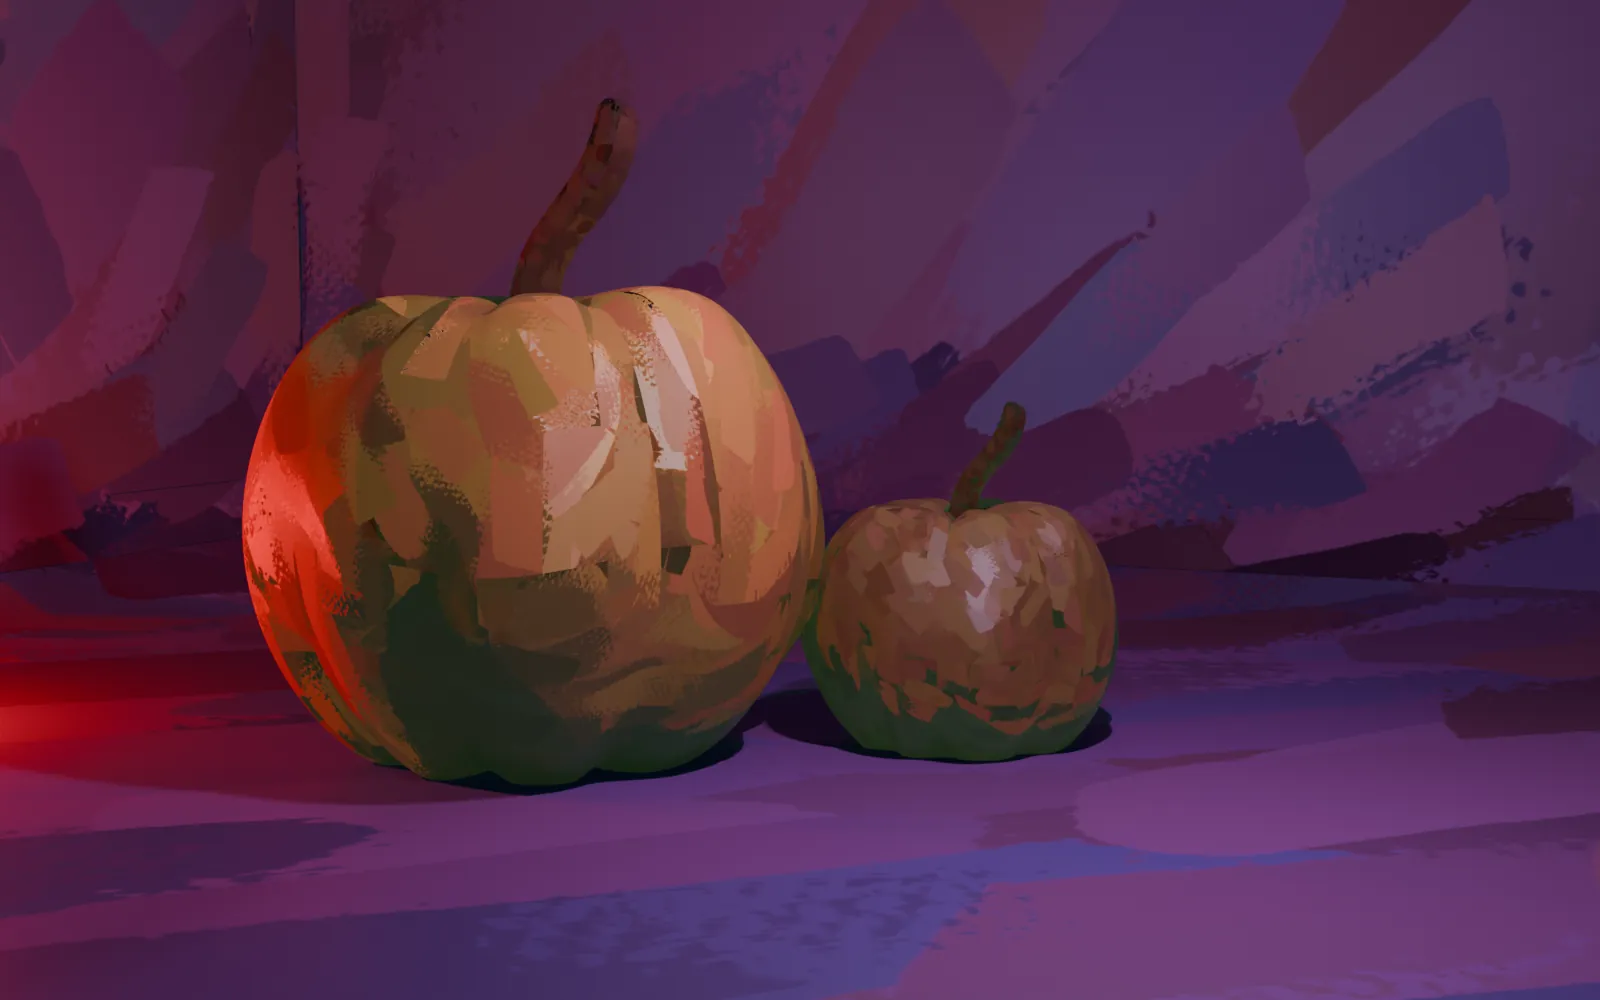
Bake a normal map, repaint it with real brush strokes and plug it into your material. One shortcut, and your model looks hand-painted under any light.
Install in four steps
- Get the add-on and download the
.zip. Don't unzip it. - In Blender, open Edit → Preferences → Get Extensions.
- Click the ⌄ menu in the top right and choose Install from Disk…, then pick the zip.
- Press N in the 3D viewport and open the Brushstroke tab.
Before and after
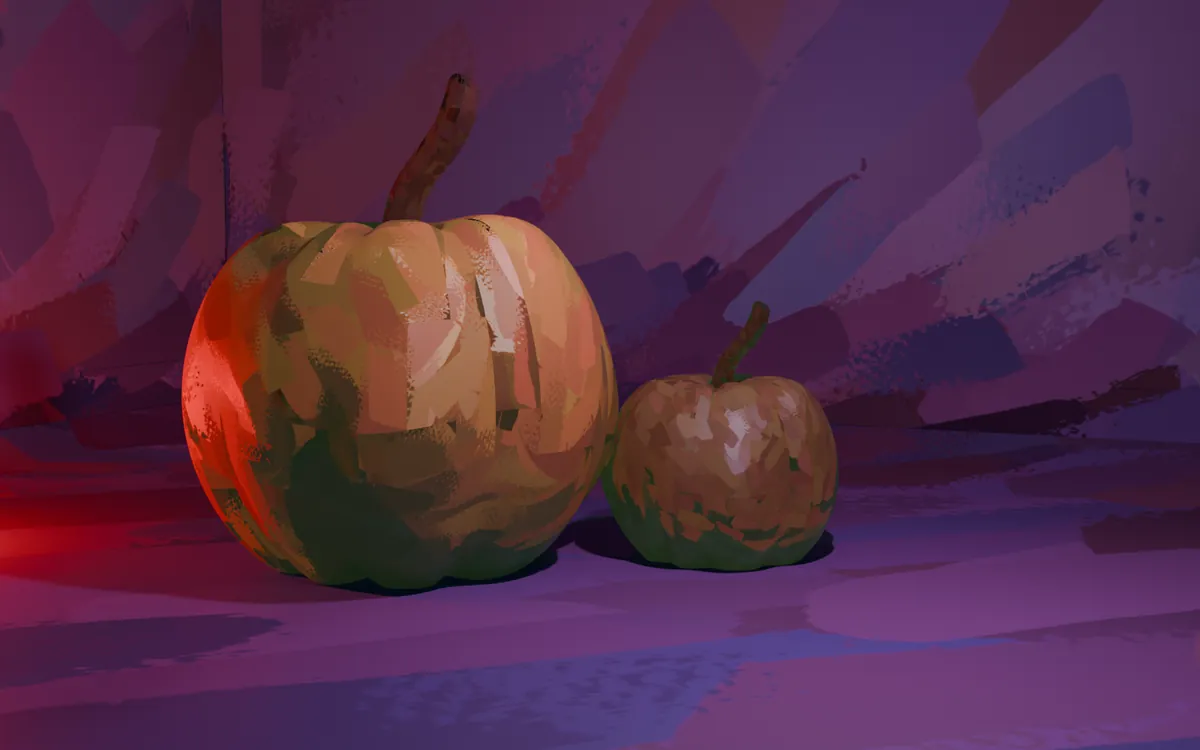
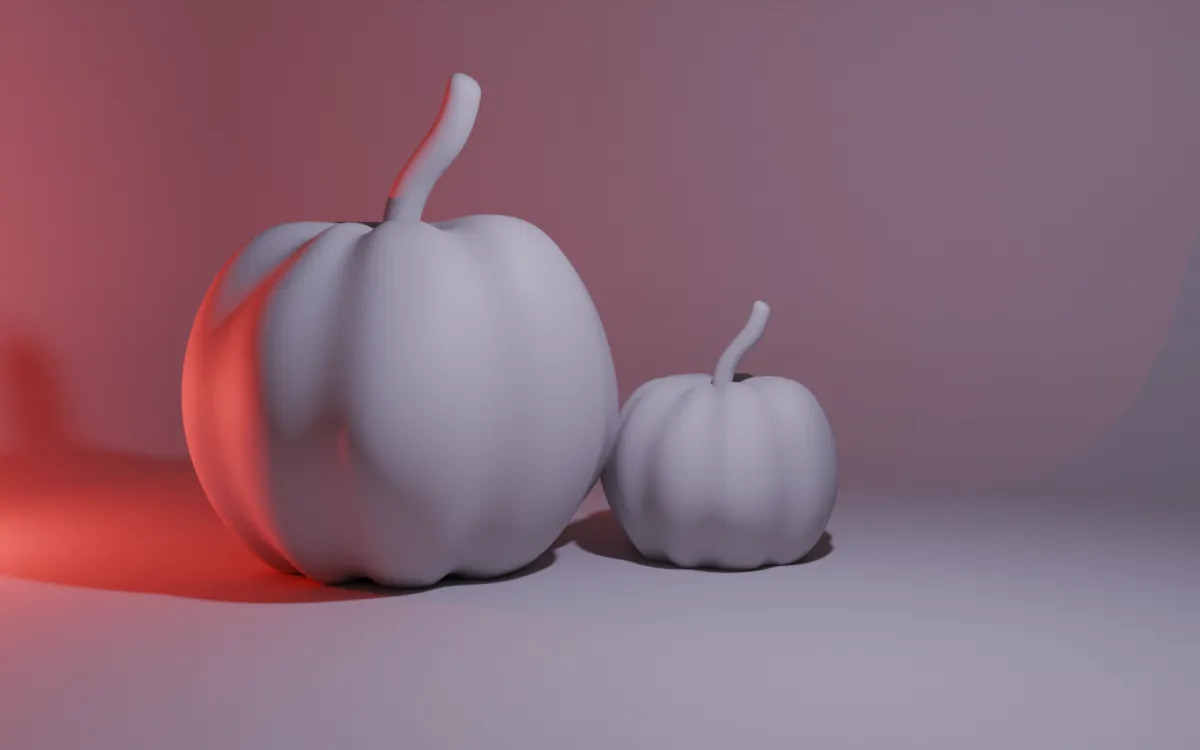 BeforeAfter
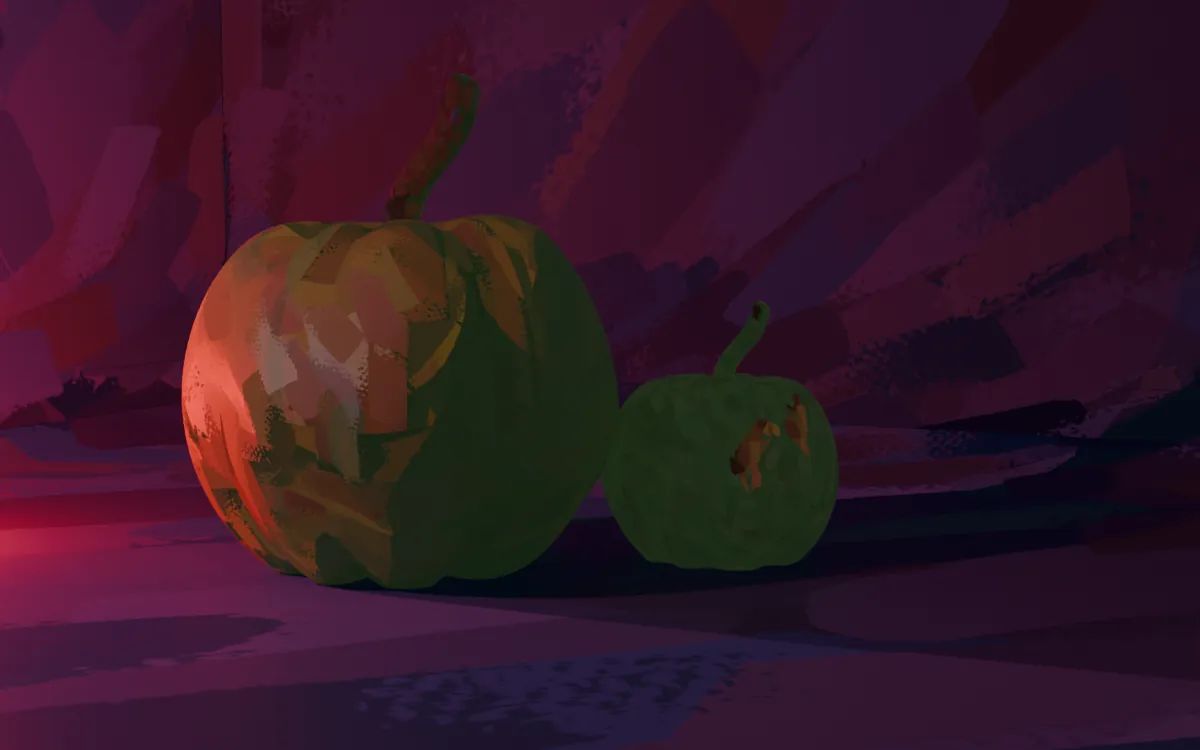
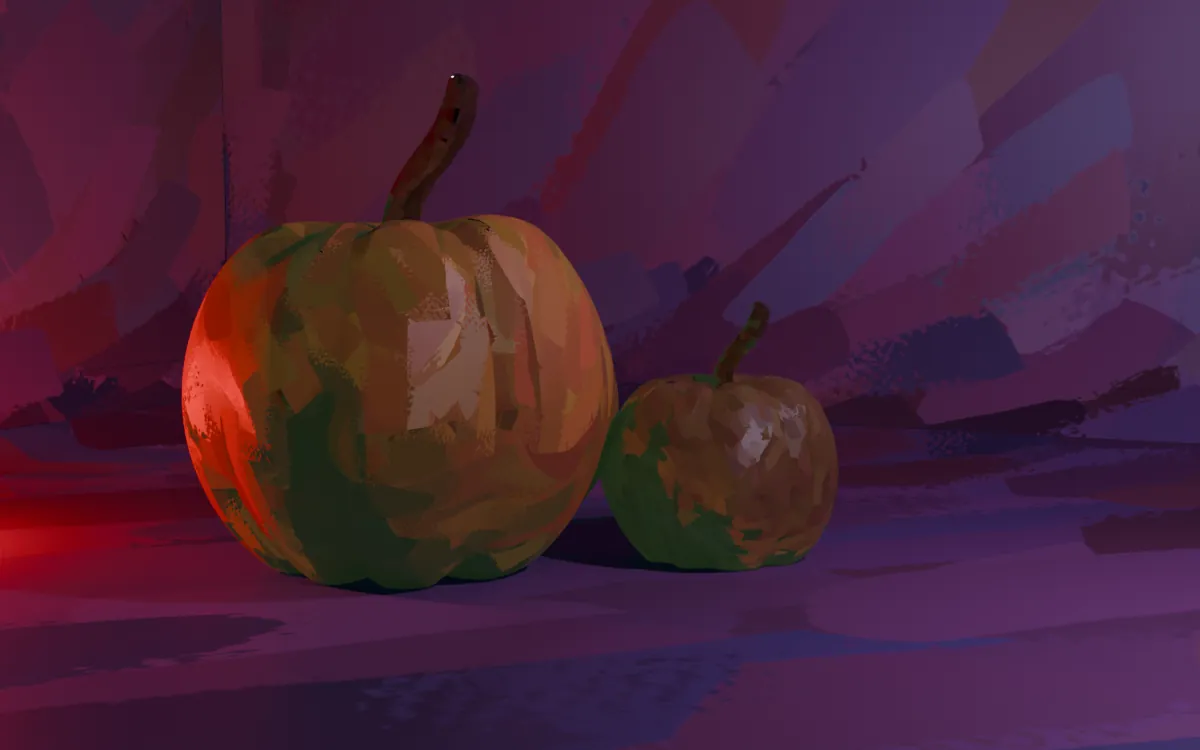
Same scene, same lights. Drag across the image to compare.
Still life
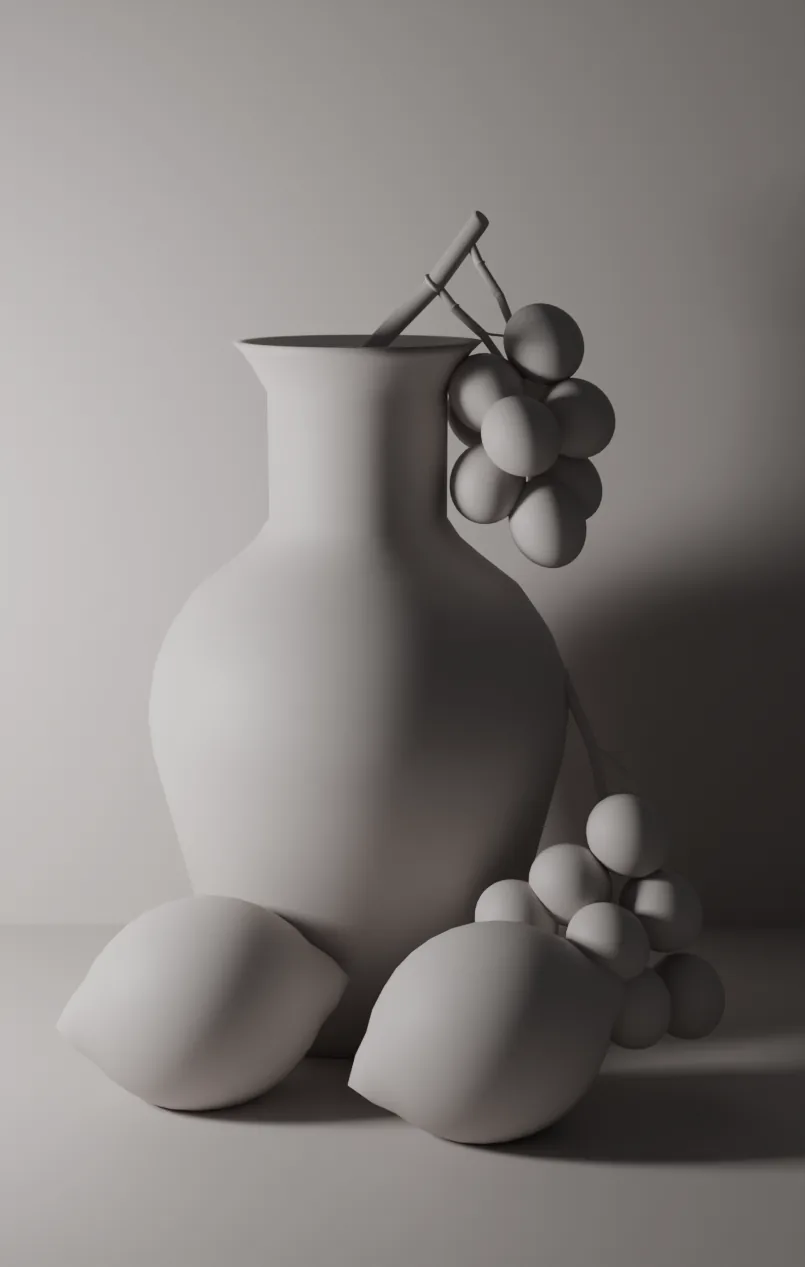
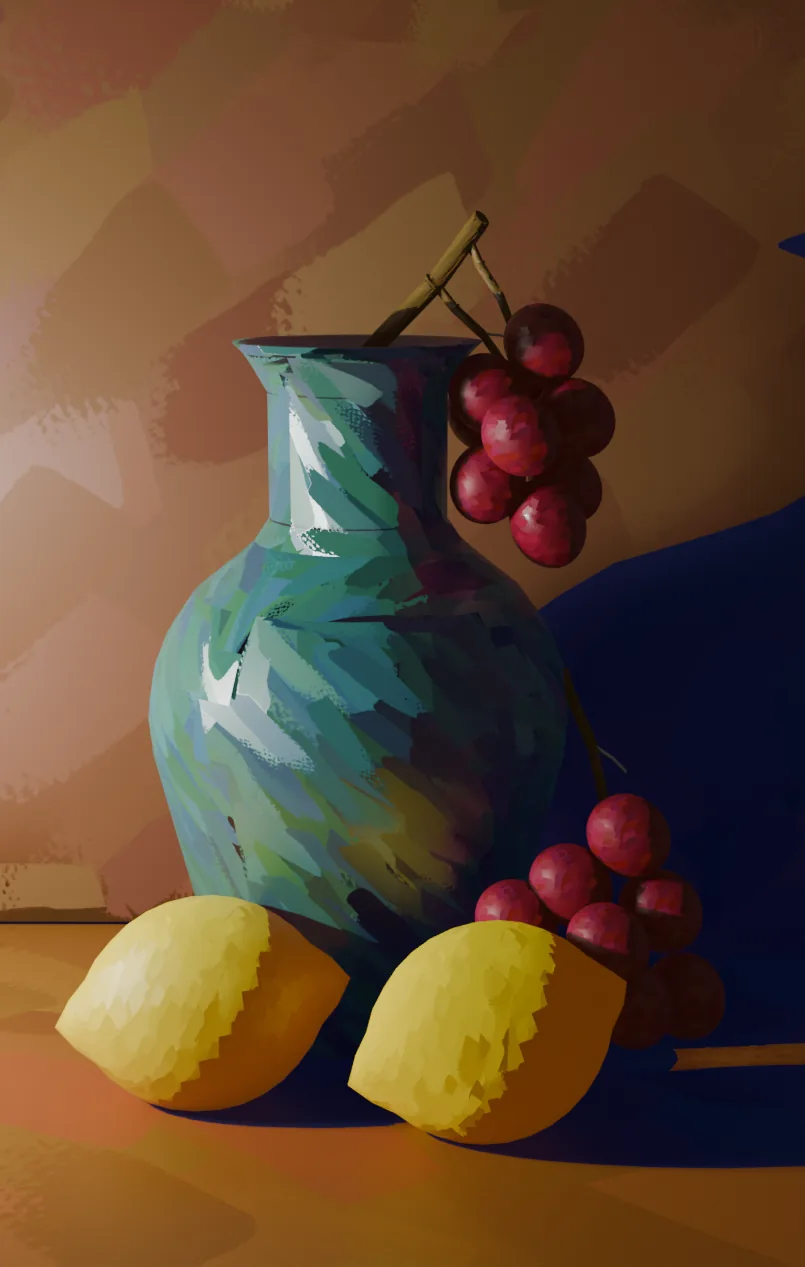
Same models, same lights, rendered in Cycles.
Pay what feels right.
Pick an amount. Every option gets you the same add-on, the same updates and the same guide.
Made by one person
Brushstroke Normals is a solo project. I build it, test it and answer questions myself. There is no company behind it.
Your support is what makes it possible to keep it working with new Blender versions and to add new things. Whatever you choose, thank you. It is really appreciated.
What you get
- The add-on for Blender 4.2 and newer, on Windows, macOS and Linux
- 24 brush shapes, five presets and the live colour setup
- Free updates for version 1.x
- The full guide
Using Brushstroke Normals
Two shortcuts do most of the work. Everything else is there to tune the look.
Quick start
- Select one or more mesh objects in Object Mode.
- Press Ctrl Alt P. The add-on bakes a normal map, paints it with brush strokes and connects it to the material.
- Press Ctrl Alt C to add the colour setup: one colour in shadow, one in light, following every light in the scene.
- Change the colours on the green Brushstroke Color node in the Shader Editor.
Painting takes a few seconds and Blender pauses while it works. 2048 px is a good default; 4096 px can take half a minute or more.
Bake & paint
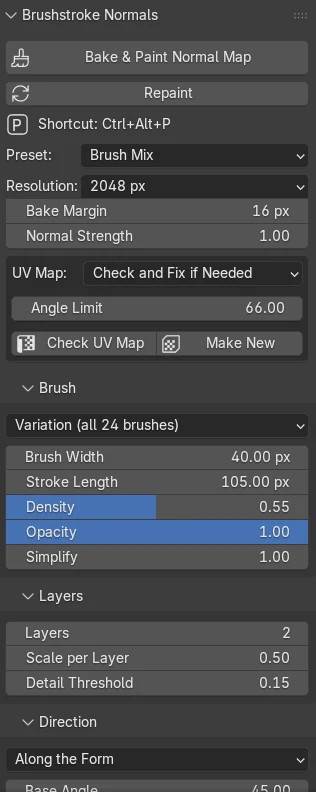
- Bake & Paint Normal Map
- Bakes an object-space normal map, paints it and plugs it into the material. Shortcut Ctrl Alt P.
- Repaint
- Paints again from the last bake with your new settings. Much faster, because it skips the bake.
- Preset
- Brush Mix, Coarse Mix, Dry Edges, Clean Edges or Finer Strokes. Sets the brush, layer and direction settings in one go.
- Resolution
- Size of the painted map: 512 to 4096 px.
- Bake Margin
- How far the bake is stretched past the UV edges, so seams don't show.
- Normal Strength
- Strength of the Normal Map node in the material.
The painted map goes into an Image Texture set to Non-Color, then into a Normal Map node in Object Space, then into Normal on the Principled BSDF. Objects without a material get a new one.
UV maps
The strokes are painted in texture space, so a messy UV map gives messy strokes. Before baking, the add-on checks the UV map for overlaps, faces outside 0–1, faces with no area, uneven density and wasted space.
- Check and Fix if Needed
- Default. Keeps your UV map if it is fine. If not, it makes a new one in a separate UV layer called
PN_UVand uses it only if it is better. Your original is never changed. - Always Make New
- Always unwraps a fresh, evenly scaled
PN_UV. - Use My UV Map
- Uses the active UV map as it is.
- Angle Limit
- For the new UV map. Higher gives fewer, bigger islands and fewer seams in the strokes.
- Check UV Map
- Reports what, if anything, is wrong with the active UV map.
- Make New
- Makes a new
PN_UVright away.
Brush
- Brushes
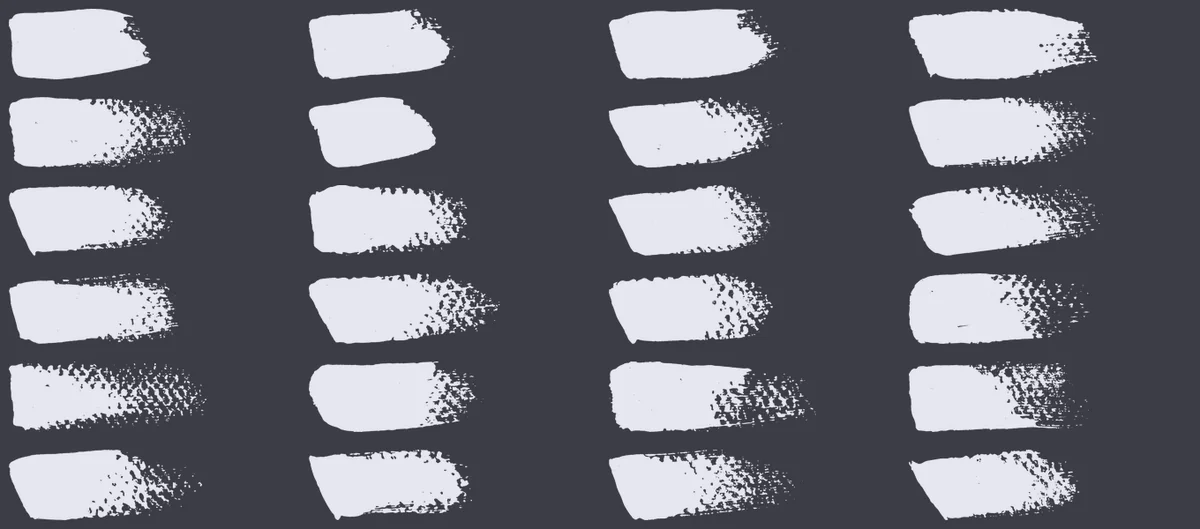
- Variation (all 24 brushes) picks a random brush for every stroke. Clean Edges and Dry Edges use only the smoothest or the most frayed ones.
- Brush Width
- Measured on a 1024 px image and scaled with the resolution, so the look stays the same at any size.
- Stroke Length
- How long each stroke is.
- Density
- How tightly strokes are packed.
- Opacity
- How much each stroke covers what is under it.
- Simplify
- Higher makes each stroke take its colour from a bigger area, so small details disappear.
Layers
- Layers
- Painting goes from big strokes to small ones, like a painter blocking in and then adding detail.
- Scale per Layer
- How much smaller the strokes get for each layer.
- Detail Threshold
- Higher means the finer layers only paint where the coarse layer missed the shape the most.
Direction
- Stroke Direction
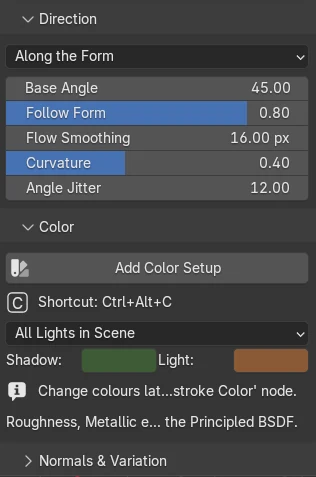
- Along the Form follows the contours of the shape. Across the Form runs where the shape changes most. Fixed Angle and Random do what they say.
- Base Angle
- Used on flat areas and in Fixed Angle mode.
- Follow Form
- How strongly strokes follow the shape versus the base angle.
- Flow Smoothing
- Smooths the direction field so strokes don't zigzag.
- Curvature
- How much each stroke bends along the form.
- Angle Jitter
- Random rotation per stroke.
Normals & Variation
- Normal Jitter
- Tilts each stroke a little, so neighbouring strokes catch the light differently.
- Edge Protection
- Stops strokes from painting across sharp edges and UV seams.
- Mix Original
- Blends the original smooth normals back in.
- Seed
- Change it for a new random arrangement of strokes with the same settings.
Color setup
Press Ctrl Alt C or Add Color Setup after painting. It adds the green Brushstroke Color node, which gives each stroke a shadow or light colour depending on how it faces the lights. It updates live when you move a light, in both EEVEE and Cycles.
- Lights
- All Lights in Scene (default) or One Light Only.
- Shadow / Light
- Starting colours for new setups. Change them later on the node.
Everything runs through the one Principled BSDF, so Roughness, Metallic, Coat, Subsurface, Alpha, reflections and cast shadows all keep working. The node only drives Base Color and Emission Color. If Base Color had a texture, it is kept and moved to the node's Own Color input.
The color node
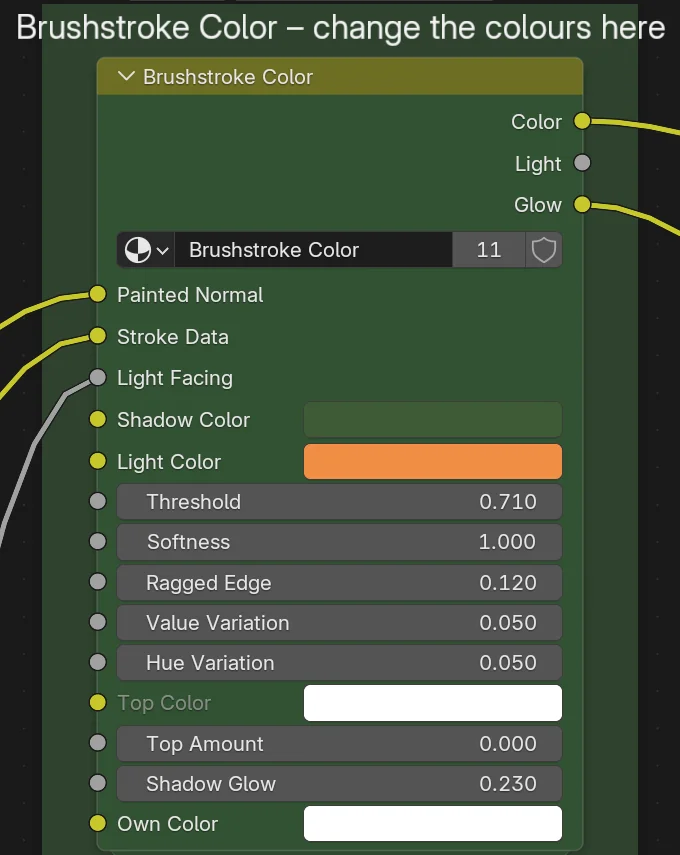
- Shadow Color
- Colour of strokes facing away from the light.
- Light Color
- Colour of strokes facing the light.
- Threshold
- Where shadow turns into light. Lower gives more light.
- Softness
- 0 gives hard, painted patches. Higher gives a soft transition.
- Ragged Edge
- Lets each stroke switch colour a bit earlier or later, so the border follows the strokes instead of a straight line.
- Value / Hue Variation
- Each stroke gets a slightly different brightness and hue.
- Top Color / Top Amount
- A third colour on strokes facing up, like moss or snow. Top Amount 0 turns it off.
- Shadow Glow
- Lifts the shadow side in the strokes' own colour. The lit side is not affected. 0 is fully physically correct.
- Own Color
- Plug your own colour texture in here. It is multiplied with the result. White means no change.
Lights
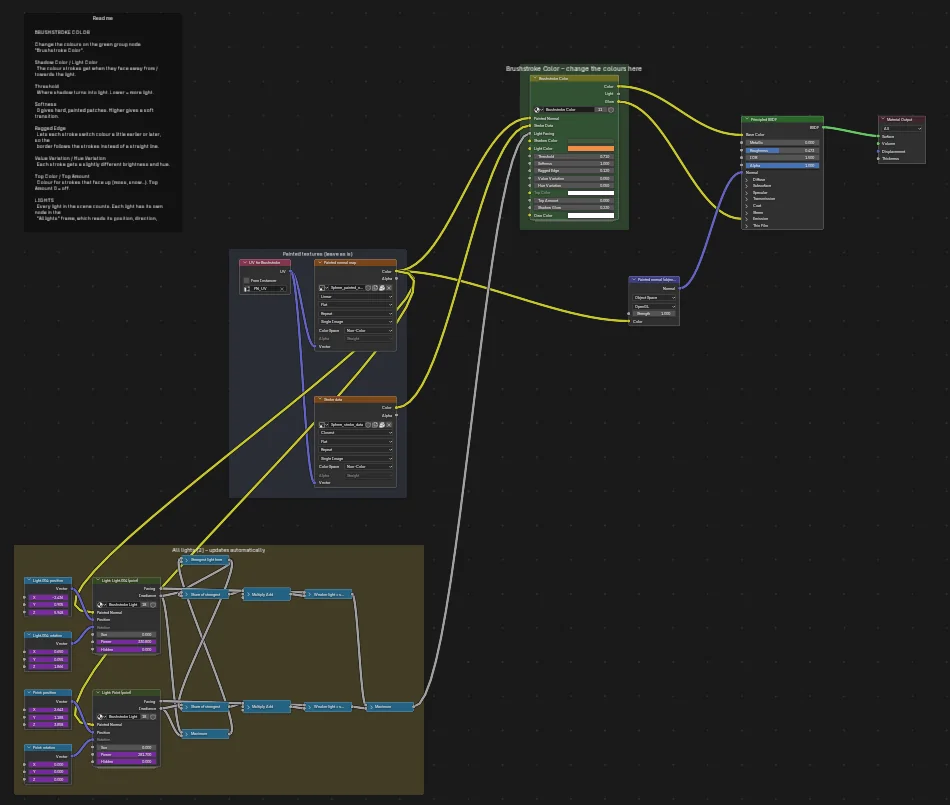
Every light in the scene gets its own node in the All lights frame. Drivers read its position, rotation, power and whether it is hidden. Add or delete a light and the frame rebuilds itself. A weaker or more distant light lights a smaller area than the strongest one, like real light. Sun, point, spot and area lights all work; spot and area lights are treated like point lights.
Node layout
The add-on keeps its nodes tidy: a Read me note on the left, the painted textures in the middle, the green colour node right before the Principled BSDF and the lights underneath. Your own Principled BSDF and Material Output stay where you put them.
Tips
Colour changes don't show
Check the Outliner for copies stacked in the same place, such as Sphere.003 on top of Sphere. This happens when Shift D is cancelled with right-click: the copy stays where the original is. Each copy has its own material, so you only see the one on top. Use Alt D for linked copies that share one material.
Exact colours
Blender's default AgX view shifts colours slightly. For the exact colours you picked, set Color Management → View Transform to Standard.
Save your file
The painted maps are packed into the .blend file. Save before closing Blender.
Older files
Files made with earlier versions upgrade automatically when you open them. Colours and connections are kept.
From smooth surface to brushwork
A normal map tells the renderer which way each point of a surface faces. Brushstroke Normals repaints that information the way a painter would, one stroke at a time.
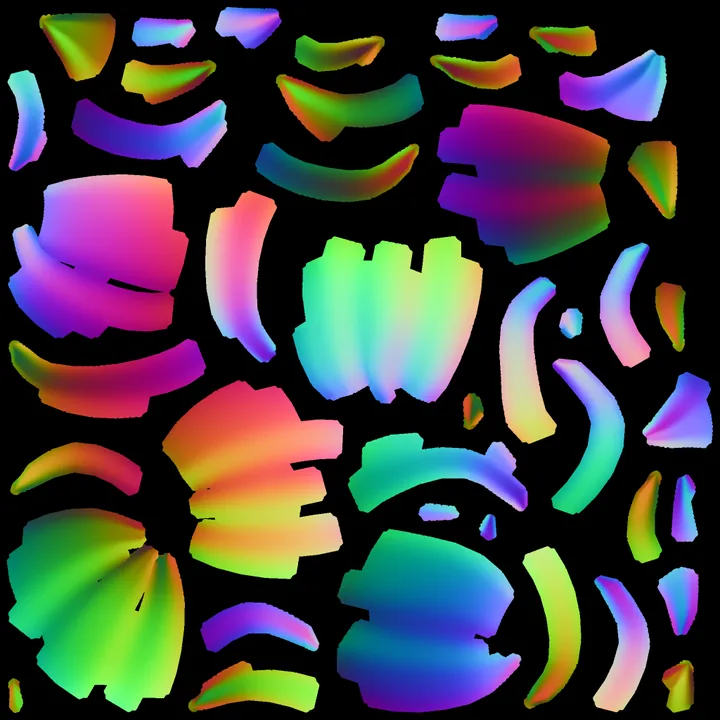 1. Bake
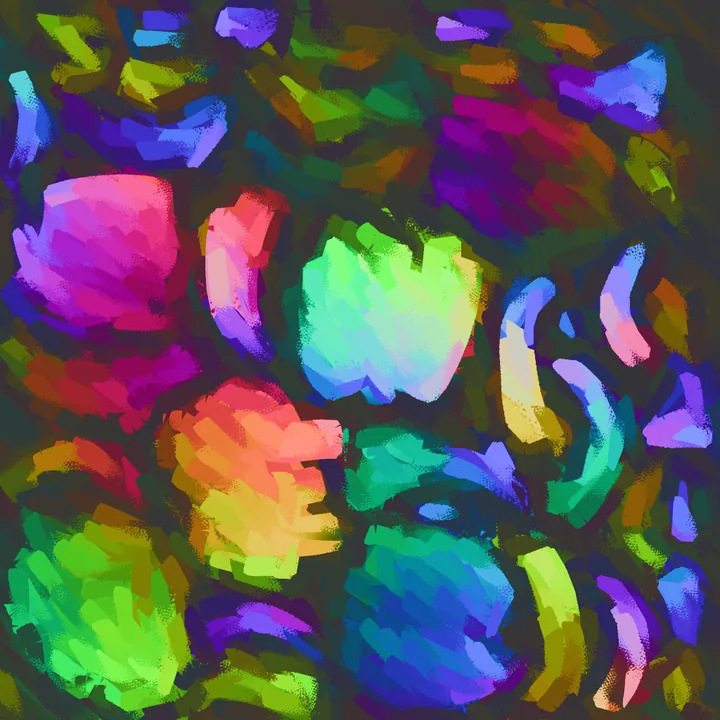 2. Paint
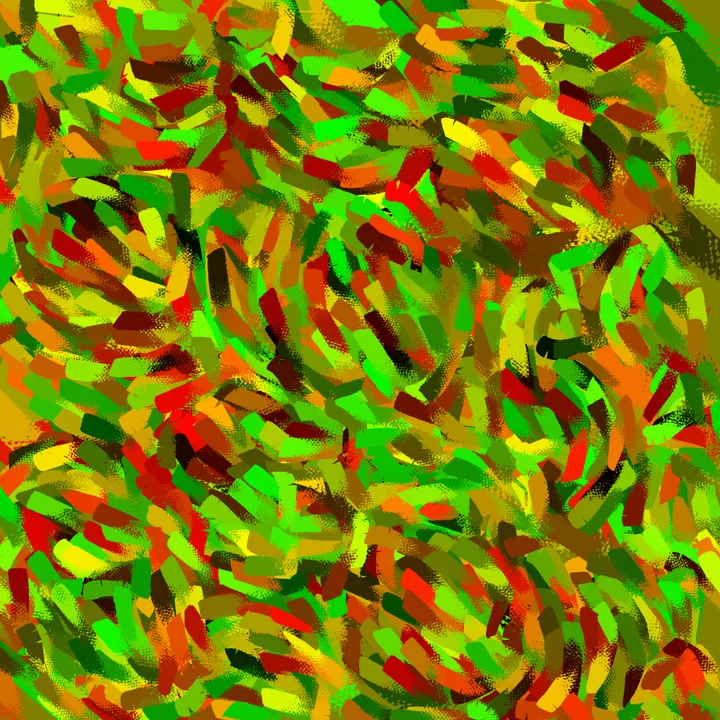 3. Stroke data
1. Bake
First the add-on checks the UV map and makes a better one if it has to. Then Cycles bakes an object-space normal map. Object space means the colours describe directions relative to the object itself, so the map works no matter how the object is rotated, and the colour node can read it directly.
2. Paint
The painter works like a person with a brush. It reads the baked map, decides which way strokes should run, and places them from big to small.
Stroke direction
It measures how the surface curves at every pixel and smooths that into a flow field. Strokes then follow that field and bend along the form, the way a painter follows the shape of a pumpkin's ribs.
Stroke colour
Each stroke takes one average direction from the area under it and paints it as a flat patch. That is what makes the surface look painted: lots of small flat planes instead of a smooth curve. A little jitter tilts each stroke so neighbours catch the light differently.
Brush shapes
The strokes use 24 brush shapes cut from scanned paint on paper, bent along the stroke path. Their dry, frayed ends give the edges texture while the inside stays solid.
Layers and edges
The first layer blocks in the big shapes. Each next layer uses smaller strokes and only paints where the previous one missed the form. Edge protection stops a stroke from smearing across a sharp edge or a UV seam.
3. Colour from light
The colour node compares each stroke's direction with the direction to every light. Strokes that face a light get the light colour, the rest get the shadow colour. Because a whole stroke shares one direction, a whole stroke flips colour at once, and the border between light and shadow follows the brushwork. The stroke data map nudges each stroke's threshold and hue a little, so no two strokes are quite the same.
All of this happens in the shader, so it updates live as you move lights, and the rest of the Principled BSDF works as usual.
Credits
Brush textures: Designed by rawpixel.com / Freepik. If you publish work made with these brushes, keep this credit with it.